Sunday, January 2, 2011

Condo renovation: Living area

The final space upstairs is the living area, which got a bit constrained when there were 4+ people in the unit.  The first "before picture" isn't our actual unit (we were blessed with the lovely green couch with the golfer pillow), but it otherwise it's identical to our unit (even down to the faux plants).  


We were inspired by a friend's recent build in Southern California and put up paneling on the main wall. It definitely gives texture and interest to the space.


We're still waiting on two chairs and footstools to arrive and eventually will get around to getting something of interest on the walls.  At the moment, I'm leaning towards horizontally hanging 10-20 wooden golf clubs above the sofa.  We'll see though...

In the meantime, we were excited to find the bright yellow wooden waterski's at Lanier's (see in the corner by the slider?), a vintage leather megaphone, a few wooden rackets, a 1960's wooden skateboard and a turquoise ball hopper as well.  They probably won't end up where they are now, but they definitely add a bit of youthful whimsy to the space.


So there's the living area.  It will be nice to get a bit more seating in the space for the next visit, but our monster couch (at least 7 ft long) was well used on our recent trip.

Thoughts/comments?  What would you do to the space?

Condo renovation: Master bedroom

In a vacation condo, you want to make sure that you've got a cozy place to rest, relax, and sleep in.  Once again, the existing room wasn't horrible, it just wasn't the what we considered cozy.


We really liked the Restoration Hardware light wood theme at the moment, but it's just so expensive.  After many trips online, I couldn't seem to justify the cost for a king size bed frame.  I turned to my fellow design blogs and was intrigued by this image posted on Apartment Therapy where old shutters were used as a head board.


While visiting one of my favorite furniture shops in Miami, Victoria's Armoire, I came across an antique Indonesian and the wheels started to turn.  Surprisingly, Mr. Big was all over the idea and everything fell into place (or was nailed into place!).


Against the muddy paint from Restoration Hardware, the headboard definitely grabs your attention, especially when viewed from the main living area.  The room looks a bit darker than it actually is in these pictures, but it definitely has a cozy, hunkered-down feel to it.


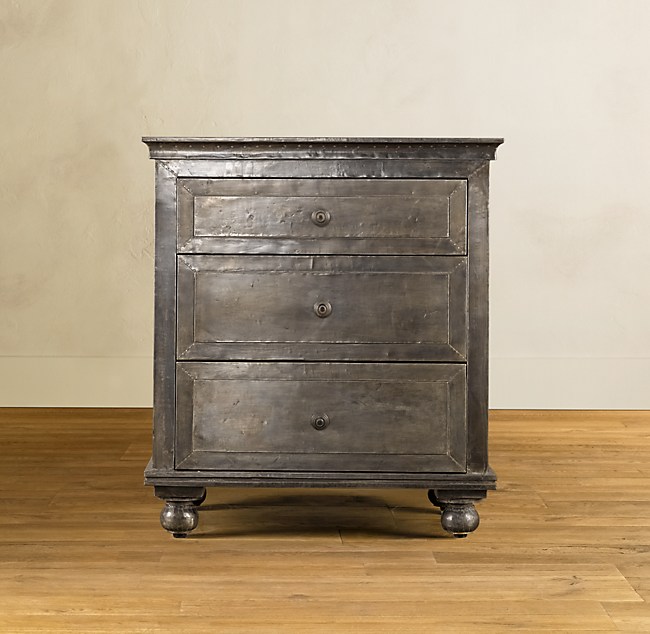
Across from the bed, we have this beautiful early-1900's chest from Hungary.  I love the simplicity and rustic feel.  Mr. Big still is trying to convince me to give it a paint, but there's no chance that he'll win that one.  Good try though!


Yet again, we were pulled towards the Restoration Hardware furniture line because we loved their Zinc Nightstand.  Wouldn't it be great on either side of the bed?  But the price was just crazy $$$$.


So we picked up these very stylish, yet "in need of TLC" side tables for a steal at a Kissimmee antiques shop, Lanier's.  We were surprised to get them home and find out that they are actually Hendredon side tables.  What a find!  With the help of the very detailed instructions at Freckled Laundry, we plan to update these babies to have a similar finish (this is obviously one of our outstanding projects).


In the "before" photo at the start of this post, you can see that there used to be a tub in the corner of the room.  While it seems like a great luxury, we really never used it in the 7+ years of owning the condo.  So it was "bye, bye tub" and the space was updated with a locking owners closet where we can leave behind enough to avoid traveling with luggage.  What a treat! And of course, I returned to Container Store for this because I find their Elfa system so practical and space conscious.


While the picture below is not of our actual unit, it is identical to our Master Bathroom except we didn't have the lovely wall paper.  If the room was getting an update, the bathroom was certainly going to follow.


I couldn't get the color to come out quite right in the bathroom pics (no natural light), but it's painted in Restoration Hardware's silver sage (or actually an exact match...to save $$ of course).  The big mirror was an antique find from South Florida.


We have a little bit of work left on the bathroom walls, but we'll get there.  At least it's starting off in the right direction.

So there is our cozy new resting area.  We've loved it so far and look forward to many restful nights.  Once again, suggestions/comments welcomed!  We do need to get the sports/amusement theme in here subtly, but I just haven't figured out how yet.  Maybe some fun pillows and wall pieces?

Condo renovation

Apologies that it's be so slow on this site...it's really been due to the fact that most of our main home has been completed (and shared!) already.  But as I have alluded to over the past few months, Mr. Big and I recently undertook a renovation of a vacation condo.  No, we can't seem to just sit still...

As a bit of background, the vacation condo was originally designed and decorated by the resort in which it resides.  It was really never a style that matched either of our preferences, but it worked and was comfortable enough.  But most importantly, it was required to allow us to rent the unit to resort visitors (to ensure consistency with all other units).  Recently we decided to take the unit out of the rental pool to keep just for ourselves, which allowed us the opportunity to renovate it if we wanted (imagine how quickly these wheels started spinning...).

While not everything is entirely completed, it's probably far enough along to share at this point.  You may have to imagine a few chairs, pictures on the walls, etc., but hopefully you'll get the gist of it.  Because it's a vacation get-away, we attempted to go for a cozy cottage, vintage, comfortable feel layered with a bit of a sports/recreation theme.

So let's start with the kitchen.  It started out looking like this:


For a rental unit, it worked satisfactorily.  Behind the upper cabinets in the last picture was a wall.  On the opposite side, there was an owners closet and hallway.  While it worked okay, it didn't seem to be the best use of space.  The most significant modification that we made in the renovation was to remove that wall and owners closet to open up the kitchen.  Ta da!


I hunted high and low for appliances on Craigslist and ebay to keep costs manageable.  It is just amazing the deals that you can find...although it does take time to find them.  I used the Ikea kitchen planning tool to determine the cabinetry layout, but at the last minute, Mr. Big went with a local cabinet supplier.  He did a good job and everything seems to fit well.  


And in a fairly substantial style change from our main house, we did a lot of open storage.  Over time, we'll fill up with some more colorful finds from my new-found antiquing hobby.  I'm shocked to find myself enjoying all the "stuff" out, but it really does contribute to the more cozy feel of the condo.  It reminds me of my grandmother's open shelves that always had fun colorful treasures within.


You can also see in the "before" photos that the dining table was previously in the living area, which resulted in a bit of a cramped space.  We went for a big picnic-type table in the kitchen, which leaves substantially more space in the living area.  The Emeco Navy chairs came from a local restaurant that was closing down.  They are so light and versatile that they move effortlessly throughout the unit.  What a great find!  And an extra large vintage salmon poacher serves as our "junk drawer" holding all our scissors, tape, and just general necessities.


It's difficult to see in the larger photos, but we went with a painted brick paver backsplash in the kitchen.  I was inspired with the beautiful job that Kim at The Twice Remembered Cottage did with her kitchen.  It adds to the vintage, imperfect feel that we were seeking for the unit.  And one of my favorite antiquing finds was this traffic sign from Napa, reminding us to slow-the-heck down.


This last image shows how we removed the walls between the kitchen and living room to open the space up.  We're really pleased with how much larger the unit feels/looks.  The style certainly is not for everyone, but it's working so far for us.

I'd love to hear any further suggestions or comments that my talented family and friends have.  Let us know what you think.  More photos to come, but this is the start!